How to Index Data from Outside of Magento
The default ranking formula in our engine yields relevant results for your users. Sometimes it makes sense to tailor these results to your business. You do this by leveraging business relevance through custom metrics. For example, you could add the number of page views to a product and use this as a ranking criterion. This way, the products that are most viewed will show up higher in your search.
To send custom metrics to Algolia, you need to add the metrics as attributes to your index and enable them for custom ranking. You can put any numerical or boolean value that represents the popularity or importance of your records.
Sometimes, this data is stored outside of your Magento installation. For example, if you want to use your Google Analytics visitor data or sales data from your ERP. To use this data in your custom ranking, you have to index the data, along with your products, in your product indices.
Integrating this data into your products takes a couple of steps, and requires some custom coding.
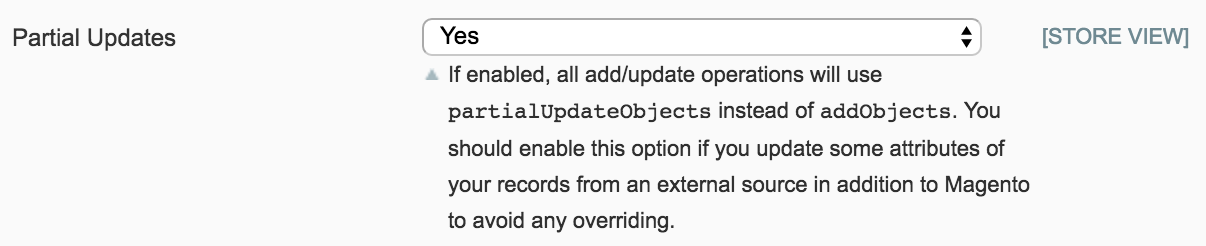
Enable Partial Updates
First of all, you have to enable partial updates. This allows you to index different attributes from different sources, without overriding the rest of the records’ attributes.
To enable partial updates, navigate to System > Configuration > Algolia Search > Advanced tab through the menu of your Magento administration, and enable Partial updates
Push Your Data from Outside of Magento
With partial updates enabled, you have to write a custom script that pushes your custom data to your indices. You can use our PHP API client or any other API client you are comfortable with to achieve this.
There are two things you have to keep in mind when writing the script:
- Products must be updated using the partialUpdateObjects method.
- When updating a product, use the products’ ID attribute as the
objectID. Otherwise, a new record is created, and your data is not linked.
To initialize your products index in your script, you need to know the index name. The index name is formatted like this: indexPrefix + codeOfYourStore + _products. If your index prefix is set to magento_, and the store code is set to default, the index name will be magento_defaul_products.
If you’re unsure what the index name is, you can find it in your index explorer.
Example
In this example, we assume a product with an ID of 1 in a magento_default_products index. We will push the visit count from Google Analytics.
Your code will look something like this:
1
2
3
4
5
6
7
8
9
10
11
12
13
14
15
16
17
18
19
20
21
22
23
24
<?php

// Composer autoload
require __DIR__ . '/vendor/autoload.php';

$productId = 1;

$visitsCount = yourMethodToGetProductsVisitsCount($productId);

$client = \Algolia\AlgoliaSearch\SearchClient::create('YourApplicationID', 'YourAdminAPIKey');
$index = $client->initIndex('magento_default_products');

$index->partialUpdateObject(
  [
    'objectID' => $productId,
    'visits'   => $visitsCount,
  ]
);

function yourMethodToGetProductsVisitsCount($productId) {
  // Get visits count for product by $productId

  return $visits;
}
This code will push additional data to your records, enabling you to use it for a custom ranking strategy.
Add Your Business Attributes to Custom Ranking
With your custom data available as an attribute in your records, there’s one last step to use it in your custom ranking: enabling it for ranking.
To achieve this, navigate to System > Configuration > Algolia search > Products tab through the menu of your Magento administration and locate the Ranking setting.
Because the attribute you want to use is not in the Magento system, it does not show up in extension’s Attribute select box.
You have to select the [use custom attribute]’ option in the select box and fill in the name of your attribute in the text box that appears. In the case of the example discussed above, it will be visits.

Hit the “Save Config” button to save your configuration. Your custom ranking formula is now all set up.
