Manage Your Application Environment
On this page
One or Many Apps
You may want to separate your development environments: development, staging, QA, production, etc.
You can do this using a single app for all environments. However, some of our customers want to keep these environments completely separate, which requires having more than one app. If you want to do this, given that one plan comes with a single app, you’ll need several plans.
You have two options:
- Separate your environments into different indices on the same app
- Create several apps, and use one per environment
All Environments on the Same Application
With this option, you create different indices for each environment.
We recommend prefixing the name of each index by the name of its environment: dev_products, staging_products, prod_products, etc.
Being on the same application, these indices share the same App ID. Yet, you can create an Algolia user for each index with different API keys for each.
You can create a new team member with access to all indices of a single environment.
To do this, go in the Apps section and click Team on the selected application.
Finally, click the Add new button and add your prefix in the indices box followed by a * (star) character.
For example, use staging_* for your staging environment.
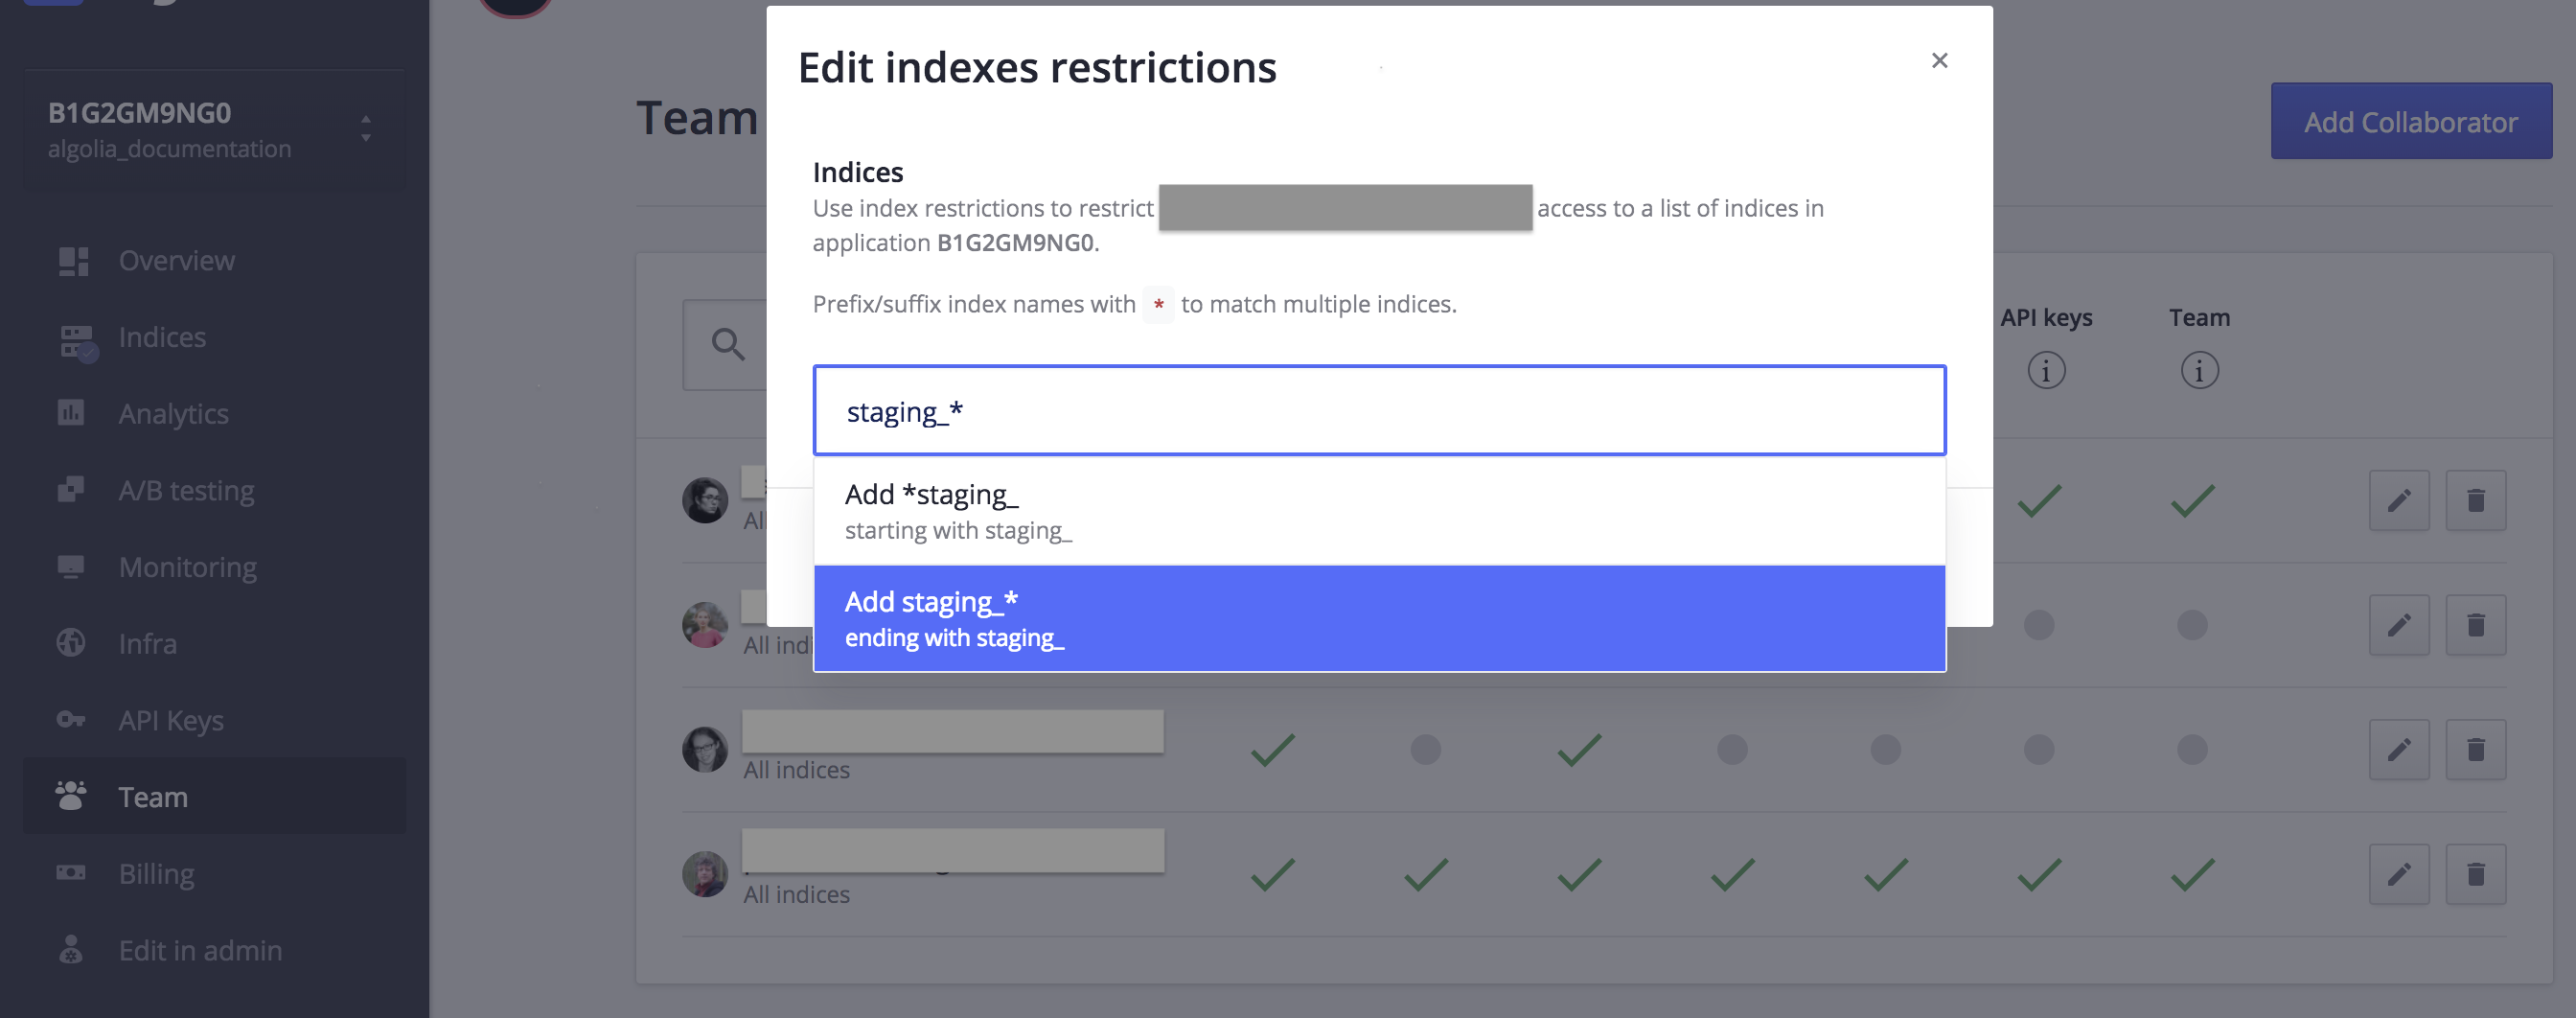
Creating a staging Algolia user
This member will have a specific admin and search-only API keys in the API Keys tab. These keys only give them access to indices matching staging_*.
You can use those keys in your code to ensure isolation between environments.
You can repeat the same operation for all your environments. The only shared elements between your environments are the number of records and operations since they belong to the same application.
One Application Per Environment
This approach provides complete isolation between the different environments. From Algolia’s point of view, these are different apps (e.g., two different Pro plans) that you can manage from the same dashboard.
You can create a new application in the My Account section of the dashboard. Then, in the Applications tab, select Create a new application. You can then switch between your applications via the top-left dropdown menu.
Unless you are on an Enterprise plan and have a dedicated cluster of servers, having multiple applications generate an invoice per application. For example, if you have two Pro plans with one application per plan, you’ll need to pay for both plans.
