Getting Started
On this page
Welcome
This guide will walk you through the few steps needed to start a project with InstantSearch Android. We will start from an empty Android project, and create a full search experience from scratch!
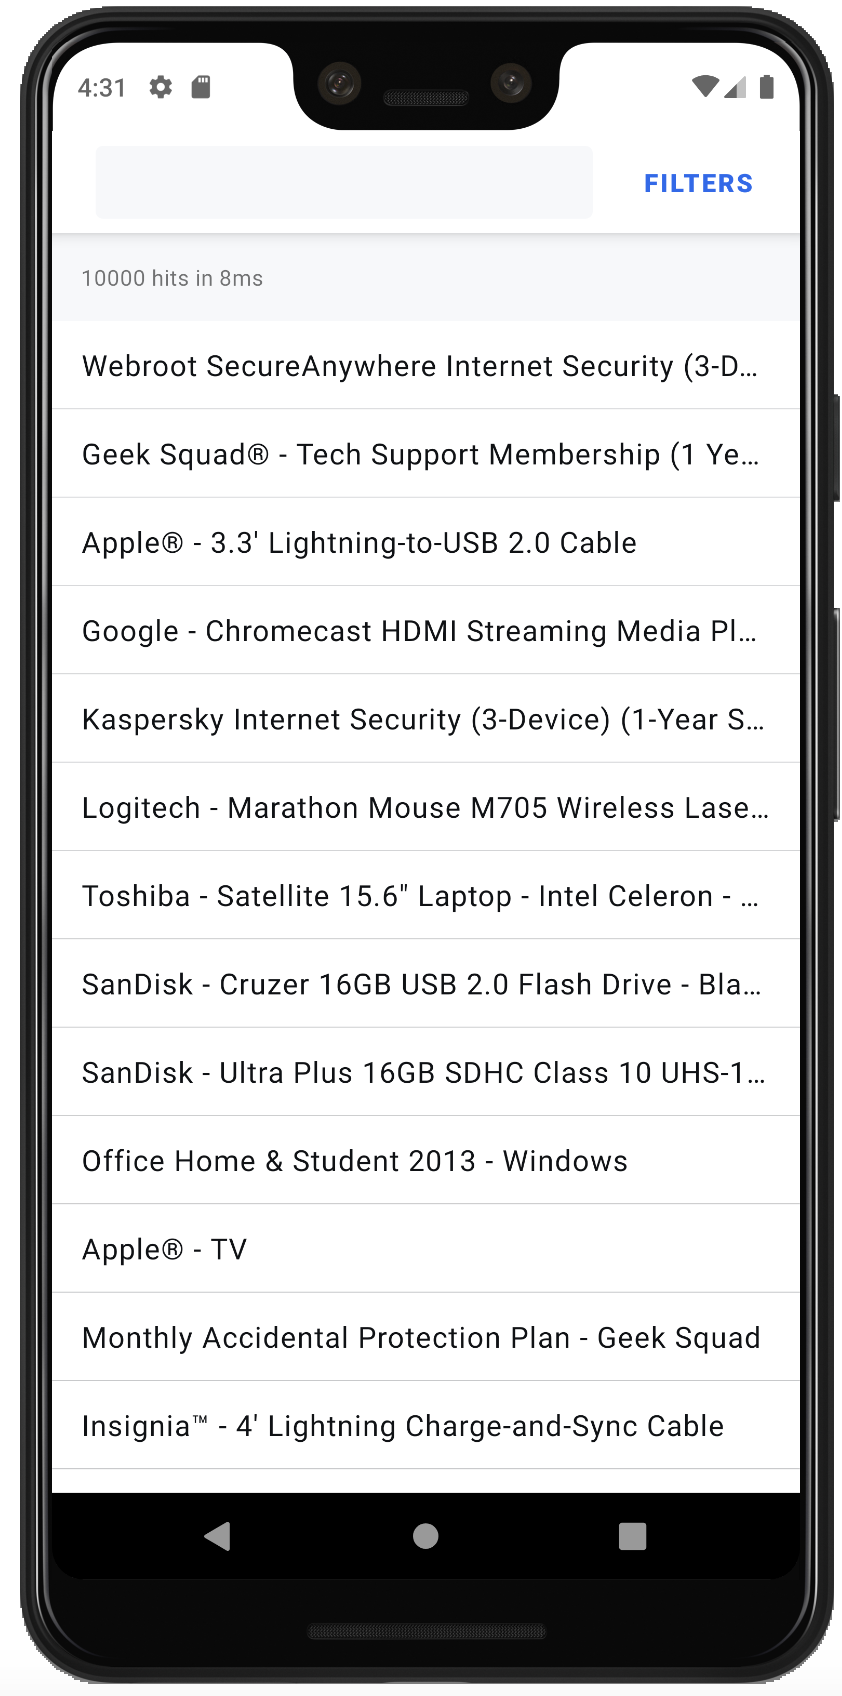
This search experience will include:
- A list to display search results
- A searchbox to type your query
- Statistics about the current search
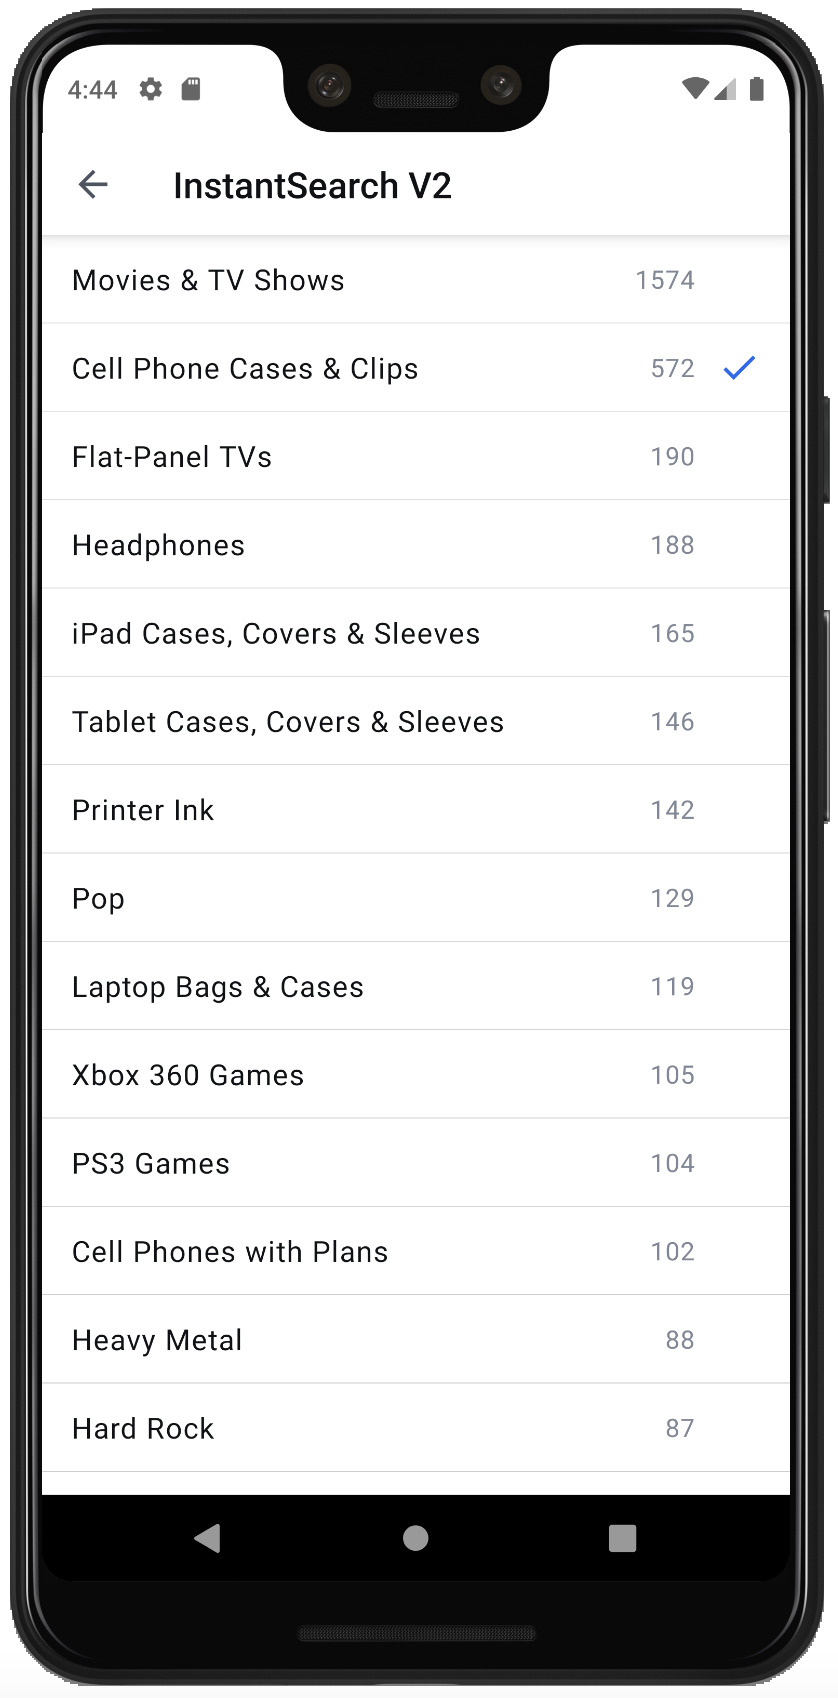
- A facet list for filtering results
Installation
To use InstantSearch Android, you need an Algolia account. You can sign up for a new account, or use the following credentials:
- APP ID:
latency - Search API Key:
3d9875e51fbd20c7754e65422f7ce5e1 - Index name:
bestbuy
These credentials will let you use a preloaded dataset of products appropriate for this guide.
Create a new Project and add InstantSearch Android
In Android Studio, create a new Project:
- On the Target screen, select Phone and Tablet
- On the Add an Activity screen, select Empty Activity
In your app’s build.gradle, add the following dependency:
1
implementation 'com.algolia:instantsearch-android:2.0.0'
We will use InstantSearch Android with Android Architecture Components, so you also need to add the following dependencies:
1
2
implementation "androidx.lifecycle:lifecycle-extensions:2.0.0"
kapt "androidx.lifecycle:lifecycle-compiler:2.0.0"
Implementation
Architecture overview
MyActivity: This activity controls the fragment currently displayed.MyViewModel: AViewModelfrom Android Architecture Components. The business logic lives here.ProductFragment: This fragment displays a list of search results in aRecyclerView, aSearchViewinput, and aStatsindicator.FacetFragment: This fragment displays a list of facets to filter your search results.
Initializing a searcher
The central part of your search experience is the Searcher. The Searcher performs search requests and obtains search results. Almost all InstantSearch components are connected with the Searcher.
In this tutorial you will only target one index, so instantiate a SearcherSingleIndex with the proper credentials.
Go to MyViewModel.kt file and add the following code:
1
2
3
4
5
6
7
8
9
10
11
class MyViewModel : ViewModel() {

    val client = ClientSearch(ApplicationID("latency"), APIKey("1f6fd3a6fb973cb08419fe7d288fa4db"), LogLevel.ALL)
    val index = client.initIndex(IndexName("bestbuy_promo"))
    val searcher = SearcherSingleIndex(index)

    override fun onCleared() {
        super.onCleared()
        searcher.cancel()
    }
}
A ViewModel is a good place to put your data sources. This way, the data persists during orientation changes and you can share it across multiple fragments.
Displaying your results: Hits
We want to display search results in a RecyclerView. To simultaneously provide a good user experience and display thousands of products, we will implement an infinite scrolling mechanism using the Paging Library from Android Architecture Component.

The first step to display your results is to create a LiveData object holding a PagedList of Product.
- Create the
Productdata class which contains a singlenamefield.
1
2
3
data class Product(
    val name: String
)
- Create the
product_item.xmlfile.
1
2
3
4
5
6
7
8
9
10
11
12
13
14
15
16
17
18
19
20
21
22
23
24
25
26
27
28
<?xml version="1.0" encoding="utf-8"?>
<com.google.android.material.card.MaterialCardView
        xmlns:android="http://schemas.android.com/apk/res/android"
        xmlns:app="http://schemas.android.com/apk/res-auto"
        xmlns:tools="http://schemas.android.com/tools"
        android:layout_width="match_parent"
        android:layout_height="?attr/listPreferredItemHeightSmall"
        android:layout_marginBottom="0.5dp"
        app:cardCornerRadius="0dp"
        tools:layout_height="50dp">

    <TextView
            android:id="@+id/productName"
            android:layout_width="wrap_content"
            android:layout_height="wrap_content"
            android:layout_gravity="center_vertical"
            android:layout_marginStart="16dp"
            android:layout_marginEnd="16dp"
            android:ellipsize="end"
            android:maxLines="1"
            android:textAppearance="?attr/textAppearanceBody1"
            app:layout_constraintBottom_toBottomOf="parent"
            app:layout_constraintEnd_toEndOf="parent"
            app:layout_constraintStart_toStartOf="parent"
            app:layout_constraintTop_toTopOf="parent"
            tools:text="@tools:sample/lorem/random" />

</com.google.android.material.card.MaterialCardView>
- Create the
ProductViewHolderto bind aProductitem to aRecyclerView.ViewHolder.
1
2
3
4
5
6
class ProductViewHolder(val view: View) : RecyclerView.ViewHolder(view) {

    fun bind(product: Product) {
        view.productName.text = product.name
    }
}
- Create a
ProductAdapterby extendingPagedListAdapter, that will bind products to theViewHolder.
1
2
3
4
5
6
7
8
9
10
11
12
13
14
15
16
17
18
19
20
21
22
23
24
25
26
27
28
29
30
31
class ProductAdapter : PagedListAdapter<Product, ProductViewHolder>(ProductAdapter) {

    override fun onCreateViewHolder(parent: ViewGroup, viewType: Int): ProductViewHolder {
        val view = LayoutInflater.from(parent.context).inflate(R.layout.product_item, parent, false)

        return ProductViewHolder(view)
    }

    override fun onBindViewHolder(holder: ProductViewHolder, position: Int) {
        val product = getItem(position)

        if (product != null) holder.bind(product)
    }

    companion object : DiffUtil.ItemCallback<Product>() {

        override fun areItemsTheSame(
            oldItem: Product,
            newItem: Product
        ): Boolean {
            return oldItem::class == newItem::class
        }

        override fun areContentsTheSame(
            oldItem: Product,
            newItem: Product
        ): Boolean {
            return oldItem.name == newItem.name
        }
    }
}
You can now use the SearcherSingleIndexDataSource.Factory with your searcher to create a LiveData<PagedList<Product>>. Do this in your ViewModel:
1
2
3
4
5
6
7
8
9
10
11
12
13
14
15
16
17
18
19
20
class MyViewModel : ViewModel() {

    // Searcher initialization
    // ...

    val dataSourceFactory = SearcherSingleIndexDataSource.Factory(searcher) { hit ->
        Product(
            hit.json.getPrimitive("name").content
        )
    }
    val pagedListConfig = PagedList.Config.Builder().setPageSize(50).build()
    val products: LiveData<PagedList<Product>> = LivePagedListBuilder(dataSourceFactory, pagedListConfig).build()
    val adapterProduct = ProductAdapter()

    override fun onCleared() {
        super.onCleared()
        searcher.cancel()
        connection.disconnect()
    }
}
To keep this example simple, we create the Product object manually from the hit’s JSON.
However, for production applications, we recommend that you use the kotlinx.serialization library to transform JSON into your objects.
Now that your ViewModel has some data, let’s create a simple product_fragment.xml with a Toolbar and a RecyclerView to display the products:
1
2
3
4
5
6
7
8
9
10
11
12
13
14
15
16
17
18
19
20
21
22
23
24
25
<?xml version="1.0" encoding="utf-8"?>
<androidx.constraintlayout.widget.ConstraintLayout
    xmlns:android="http://schemas.android.com/apk/res/android"
    xmlns:app="http://schemas.android.com/apk/res-auto"
    android:layout_width="match_parent"
    android:layout_height="match_parent">

    <androidx.appcompat.widget.Toolbar
        android:id="@+id/toolbar"
        app:layout_constraintTop_toTopOf="parent"
        android:layout_width="0dp"
        app:layout_constraintEnd_toEndOf="parent"
        app:layout_constraintStart_toStartOf="parent"
        android:layout_height="?attr/actionBarSize"/>

    <androidx.recyclerview.widget.RecyclerView
        android:id="@+id/productList"
        app:layout_constraintTop_toBottomOf="@id/stats"
        app:layout_constraintEnd_toEndOf="parent"
        app:layout_constraintStart_toStartOf="parent"
        app:layout_constraintBottom_toBottomOf="parent"
        android:layout_width="0dp"
        android:layout_height="0dp"/>

</androidx.constraintlayout.widget.ConstraintLayout>
- In the
ProductFragment, get a reference ofMyViewModelwith aViewModelProviders. - Then, observe the
LiveDatato update yourProductAdapteron every new page of products. - Finally, configure your
RecyclerViewby setting its adapter andLayoutManager.
1
2
3
4
5
6
7
8
9
10
11
12
13
14
15
16
17
18
19
20
class ProductFragment : Fragment() {

    override fun onCreateView(inflater: LayoutInflater, container: ViewGroup?, savedInstanceState: Bundle?): View? {
        return inflater.inflate(R.layout.product_fragment, container, false)
    }

    override fun onViewCreated(view: View, savedInstanceState: Bundle?) {
        super.onViewCreated(view, savedInstanceState)
        val viewModel = ViewModelProviders.of(requireActivity())[MyViewModel::class.java]

        viewModel.products.observe(this, Observer { hits -> viewModel.adapterProduct.submitList(hits) })

        productList.let {
            it.itemAnimator = null
            it.adapter = viewModel.adapterProduct
            it.layoutManager = LinearLayoutManager(requireContext())
            it.autoScrollToStart(viewModel.adapterProduct)
        }
    }
}
You have now learned how to display search results in an infinite scrolling RecyclerView.
Searching your data: SearchBox
To search your data, users will need an input field. Any change in this field should trigger a new request, and then update the search results displayed.
To achieve this, you will use a SearchBoxConnectorPagedList. This takes a searcher and one or multiple LiveData<PagedList<T>> as arguments.
- First, pass your products
LiveDatadefined above:
1
2
3
4
5
6
7
8
9
10
11
12
13
14
15
16
17
18
19
class MyViewModel : ViewModel() {

    // Searcher initialization
    // Hits initialization
    // ...

    val searchBox = SearchBoxConnectorPagedList(searcher, listOf(products))
    val connection = ConnectionHandler()

    init {
        connection += searchBox
    }

    override fun onCleared() {
        super.onCleared()
        searcher.cancel()
        connection.disconnect()
    }
}
Most InstantSearch components should be connected and disconnected in accordance to the Android Lifecycle and to avoid memory leaks.
A ConnectionHandler handles a set of Connections for you: Each += call with a component implementing the Connection interface will connect it and make it active. Whenever you want to free resources or deactivate a component, call the disconnect method.
- You can now add a
SearchViewin yourToolbar:
1
2
3
4
5
6
7
8
9
10
11
12
13
14
15
16
17
18
19
20
21
22
23
24
25
26
27
28
29
30
31
32
33
34
35
36
37
38
39
40
41
42
43
44
45
46
47
48
<?xml version="1.0" encoding="utf-8"?>
<androidx.constraintlayout.widget.ConstraintLayout
    xmlns:android="http://schemas.android.com/apk/res/android"
    xmlns:app="http://schemas.android.com/apk/res-auto"
    android:layout_width="match_parent"
    android:layout_height="match_parent">

    <androidx.appcompat.widget.Toolbar
        android:id="@+id/toolbar"
        app:layout_constraintTop_toTopOf="parent"
        android:layout_width="0dp"
        app:layout_constraintEnd_toEndOf="parent"
        app:layout_constraintStart_toStartOf="parent"
        android:layout_height="?attr/actionBarSize">

        <androidx.constraintlayout.widget.ConstraintLayout
            xmlns:tools="http://schemas.android.com/tools"
            android:layout_width="match_parent"
            android:layout_height="match_parent"
            android:clipChildren="false"
            android:clipToPadding="false">

            <androidx.appcompat.widget.SearchView
                android:id="@+id/searchView"
                android:layout_width="0dp"
                android:layout_height="0dp"
                android:focusable="false"
                app:layout_constraintBottom_toBottomOf="parent"
                app:layout_constraintEnd_toStartOf="@id/filters"
                app:layout_constraintStart_toStartOf="parent"
                app:layout_constraintTop_toTopOf="parent"
                app:iconifiedByDefault="false"
                tools:queryHint="@string/search_colors"/>

        </androidx.constraintlayout.widget.ConstraintLayout>

    </androidx.appcompat.widget.Toolbar>

    <androidx.recyclerview.widget.RecyclerView
        android:id="@+id/productList"
        app:layout_constraintTop_toBottomOf="@id/stats"
        app:layout_constraintEnd_toEndOf="parent"
        app:layout_constraintStart_toStartOf="parent"
        app:layout_constraintBottom_toBottomOf="parent"
        android:layout_width="0dp"
        android:layout_height="0dp"/>

</androidx.constraintlayout.widget.ConstraintLayout>
- Connect
SearchBoxViewAppCompatto theSearchBoxConnectorPagedListstored inMyViewModel, using a newConnectionHandlerconforming to theProductFragmentlifecycle:
1
2
3
4
5
6
7
8
9
10
11
12
13
14
15
16
17
18
19
20
21
22
23
24
25
class ProductFragment : Fragment() {

    private val connection = ConnectionHandler()

    override fun onCreateView(inflater: LayoutInflater, container: ViewGroup?, savedInstanceState: Bundle?): View? {
        return inflater.inflate(R.layout.product_fragment, container, false)
    }

    override fun onViewCreated(view: View, savedInstanceState: Bundle?) {
        super.onViewCreated(view, savedInstanceState)
        val viewModel = ViewModelProviders.of(requireActivity())[MyViewModel::class.java]

        // Hits
        // ...

        val searchBoxView = SearchBoxViewAppCompat(searchView)

        connection += viewModel.searchBox.connectView(searchBoxView)
    }

    override fun onDestroyView() {
        super.onDestroyView()
        connection.disconnect()
    }
}
Displaying metadata: Stats
It is a good practice to show the number of hits that were returned for a search. We will use the Stats components to achieve this in a few lines:
- Add a
StatsConnectorto yourMyViewModel, and connect it with aConnectionHandler.
1
2
3
4
5
6
7
8
9
10
11
12
13
14
15
16
17
18
19
20
21
class MyViewModel : ViewModel() {

    // Searcher initialization
    // Hits initialization
    // SearchBox initialization
    // ...

    val stats = StatsConnector(searcher)

    val connection = ConnectionHandler()

    init {
        connection += stats
    }

    override fun onCleared() {
        super.onCleared()
        searcher.cancel()
        connection.disconnect()
    }
}
- Add a
TextViewto yourproduct_fragment.xmlfile to display the stats.
1
2
3
4
5
6
7
8
9
10
11
12
13
14
15
16
17
18
19
20
21
22
23
24
25
26
27
28
29
30
31
32
33
34
35
36
37
38
39
40
41
42
43
44
45
46
47
48
49
50
51
52
53
54
55
56
57
58
<?xml version="1.0" encoding="utf-8"?>
<androidx.constraintlayout.widget.ConstraintLayout
    xmlns:android="http://schemas.android.com/apk/res/android"
    xmlns:app="http://schemas.android.com/apk/res-auto"
    android:layout_width="match_parent"
    android:layout_height="match_parent">

    <androidx.appcompat.widget.Toolbar
        android:id="@+id/toolbar"
        app:layout_constraintTop_toTopOf="parent"
        android:layout_width="0dp"
        app:layout_constraintEnd_toEndOf="parent"
        app:layout_constraintStart_toStartOf="parent"
        android:layout_height="?attr/actionBarSize">

        <androidx.constraintlayout.widget.ConstraintLayout
            xmlns:tools="http://schemas.android.com/tools"
            android:layout_width="match_parent"
            android:layout_height="match_parent"
            android:clipChildren="false"
            android:clipToPadding="false">

            <androidx.appcompat.widget.SearchView
                android:id="@+id/searchView"
                android:layout_width="0dp"
                android:layout_height="0dp"
                android:focusable="false"
                app:layout_constraintBottom_toBottomOf="parent"
                app:layout_constraintEnd_toStartOf="@id/filters"
                app:layout_constraintStart_toStartOf="parent"
                app:layout_constraintTop_toTopOf="parent"
                app:iconifiedByDefault="false"
                tools:queryHint="@string/search_colors"/>

        </androidx.constraintlayout.widget.ConstraintLayout>

    </androidx.appcompat.widget.Toolbar>

    <TextView
        android:id="@+id/stats"
        android:textAppearance="@style/TextAppearance.MaterialComponents.Caption"
        app:layout_constraintTop_toBottomOf="@+id/toolbar"
        app:layout_constraintStart_toStartOf="parent"
        app:layout_constraintEnd_toEndOf="parent"
        android:padding="16dp"
        android:layout_width="0dp"
        android:layout_height="wrap_content"/>

    <androidx.recyclerview.widget.RecyclerView
        android:id="@+id/productList"
        app:layout_constraintTop_toBottomOf="@id/stats"
        app:layout_constraintEnd_toEndOf="parent"
        app:layout_constraintStart_toStartOf="parent"
        app:layout_constraintBottom_toBottomOf="parent"
        android:layout_width="0dp"
        android:layout_height="0dp"/>

</androidx.constraintlayout.widget.ConstraintLayout>
- Finally, connect the
StatsConnectorto aStatsTextViewin yourProductFragment.
1
2
3
4
5
6
7
8
9
10
11
12
13
14
15
16
17
18
19
20
21
22
23
24
25
26
class ProductFragment : Fragment() {

    private val connection = ConnectionHandler()

    override fun onCreateView(inflater: LayoutInflater, container: ViewGroup?, savedInstanceState: Bundle?): View? {
        return inflater.inflate(R.layout.product_fragment, container, false)
    }

    override fun onViewCreated(view: View, savedInstanceState: Bundle?) {
        super.onViewCreated(view, savedInstanceState)
        val viewModel = ViewModelProviders.of(requireActivity())[MyViewModel::class.java]

        // Hits
        // SearchBox
        // ...

        val statsView = StatsTextView(stats)

        connection += viewModel.stats.connectView(statsView, StatsPresenterImpl())
    }

    override fun onDestroyView() {
        super.onDestroyView()
        connection.disconnect()
    }
}
Filter your data: FacetList

Filtering search results helps your users find exactly what they want. We will create a FacetList to filter our products by category:
- First, create a
facet_item.xmlfile. This will be your layout for aRecyclerView.ViewHolder.
1
2
3
4
5
6
7
8
9
10
11
12
13
14
15
16
17
18
19
20
21
22
23
24
25
26
27
28
29
30
31
32
33
34
35
36
37
38
39
40
41
42
43
44
45
46
47
48
49
50
51
52
53
54
55
56
57
58
59
60
61
62
63
64
65
66
67
<com.google.android.material.card.MaterialCardView
        xmlns:android="http://schemas.android.com/apk/res/android"
        xmlns:app="http://schemas.android.com/apk/res-auto"
        xmlns:tools="http://schemas.android.com/tools"
        android:layout_width="match_parent"
        android:layout_height="?attr/listPreferredItemHeightSmall"
        android:layout_marginBottom="0.5dp"
        app:cardCornerRadius="0dp"
        tools:layout_height="50dp">

    <androidx.constraintlayout.widget.ConstraintLayout
            android:layout_width="match_parent"
            android:layout_height="match_parent">

        <ImageView
                android:id="@+id/icon"
                style="@style/Icon"
                android:layout_width="wrap_content"
                android:layout_height="wrap_content"
                android:layout_marginEnd="12dp"
                android:src="@drawable/ic_check"
                android:tint="?attr/colorPrimary"
                android:visibility="invisible"
                app:layout_constrainedHeight="true"
                app:layout_constrainedWidth="true"
                app:layout_constraintBottom_toBottomOf="parent"
                app:layout_constraintEnd_toEndOf="parent"
                app:layout_constraintTop_toTopOf="parent"
                tools:visibility="visible" />

        <TextView
                android:id="@+id/facetCount"
                android:layout_width="wrap_content"
                android:layout_height="wrap_content"
                android:layout_marginEnd="8dp"
                android:ellipsize="end"
                android:gravity="end"
                android:maxLines="1"
                android:textAppearance="?attr/textAppearanceBody2"
                android:textColor="@color/grey_light"
                android:visibility="gone"
                app:layout_constrainedHeight="true"
                app:layout_constrainedWidth="true"
                app:layout_constraintBottom_toBottomOf="parent"
                app:layout_constraintEnd_toStartOf="@id/icon"
                app:layout_constraintTop_toTopOf="parent"
                tools:text="@tools:sample/lorem"
                tools:visibility="visible" />

        <TextView
                android:id="@+id/facetName"
                android:layout_width="0dp"
                android:layout_height="wrap_content"
                android:layout_marginStart="16dp"
                android:layout_marginEnd="16dp"
                android:ellipsize="end"
                android:maxLines="1"
                android:textAppearance="?attr/textAppearanceBody1"
                app:layout_constraintBottom_toBottomOf="parent"
                app:layout_constraintEnd_toStartOf="@id/facetCount"
                app:layout_constraintStart_toStartOf="parent"
                app:layout_constraintTop_toTopOf="parent"
                tools:text="@tools:sample/lorem/random" />

    </androidx.constraintlayout.widget.ConstraintLayout>

</com.google.android.material.card.MaterialCardView>
- Then, implement
FacetListViewHolderand itsFactory, so that later on it works with aFacetListAdapter.
1
2
3
4
5
6
7
8
9
10
11
12
13
14
15
16
17
class MyFacetListViewHolder(view: View) : FacetListViewHolder(view) {

    override fun bind(facet: Facet, selected: Boolean, onClickListener: View.OnClickListener) {
        view.setOnClickListener(onClickListener)
        view.facetCount.text = facet.count.toString()
        view.facetCount.visibility = View.VISIBLE
        view.icon.visibility = if (selected) View.VISIBLE else View.INVISIBLE
        view.facetName.text = facet.value
    }

    object Factory : FacetListViewHolder.Factory {

        override fun createViewHolder(parent: ViewGroup): FacetListViewHolder {
            return MyFacetListViewHolder(parent.inflate(R.layout.facet_list_item))
        }
    }
}
We use a new component to handle the filtering logic: the FilterState.
- Pass the
FilterStateto yourFacetListConnector. TheFacetListConnectorneeds anAttribute: you should usecategory. - Inject
MyFacetListViewHolder.Factoryinto yourFacetListAdapter. TheFacetListAdapteris an out of the boxRecyclerView.Adapterfor aFacetList. -
Connect the different part togethers:
- The
Searcherconnects itself to theFilterState, and applies its filters with every search. - The
FilterStateconnects to your productsLiveDatato invalidate search results when new filter are applied. - Finally, the
facetListconnects to its adapter.
- The
1
2
3
4
5
6
7
8
9
10
11
12
13
14
15
16
17
18
19
20
21
22
23
24
25
26
27
28
29
30
class MyViewModel : ViewModel() {

    val filterState = FilterState()
    val facetList = FacetListConnector(
        searcher = searcher,
        filterState = filterState,
        attribute = Attribute("category"),
        selectionMode = SelectionMode.Single
    )
    val facetPresenter = FacetListPresenterImpl(
        sortBy = listOf(FacetSortCriterion.CountDescending, FacetSortCriterion.IsRefined),
        limit = 100
    )
    val adapterFacet = FacetListAdapter(MyFacetListViewHolder.Factory)

    val connection = ConnectionHandler()

    init {
        connection += facetList
        connection += searcher.connectFilterState(filterState)
        connection += facetList.connectView(adapterFacet, facetPresenter)
        connection += filterState.connectPagedList(products)
    }

    override fun onCleared() {
        super.onCleared()
        searcher.cancel()
        connection.disconnect()
    }
}
- To display your facets, create a
facet_fragment.xmllayout with aRecyclerView.
1
2
3
4
5
6
7
8
9
10
11
12
13
14
15
16
17
18
19
20
21
22
23
24
25
26
<?xml version="1.0" encoding="utf-8"?>
<androidx.constraintlayout.widget.ConstraintLayout
    xmlns:android="http://schemas.android.com/apk/res/android"
    xmlns:app="http://schemas.android.com/apk/res-auto"
    android:layout_width="match_parent"
    android:layout_height="match_parent">

    <androidx.appcompat.widget.Toolbar
        android:id="@+id/toolbar"
        app:layout_constraintTop_toTopOf="parent"
        android:layout_width="0dp"
        app:layout_constraintEnd_toEndOf="parent"
        app:layout_constraintStart_toStartOf="parent"
        android:layout_height="?attr/actionBarSize"/>

    <androidx.recyclerview.widget.RecyclerView
        android:id="@+id/facetList"
        android:background="@color/white"
        app:layout_constraintTop_toBottomOf="@id/toolbar"
        app:layout_constraintEnd_toEndOf="parent"
        app:layout_constraintStart_toStartOf="parent"
        app:layout_constraintBottom_toBottomOf="parent"
        android:layout_width="0dp"
        android:layout_height="0dp"/>

</androidx.constraintlayout.widget.ConstraintLayout>
- Configure your
RecyclerViewwith its adapter andLayoutManager.
1
2
3
4
5
6
7
8
9
10
11
12
13
14
15
16
17
class FacetFragment : Fragment() {

    override fun onCreateView(inflater: LayoutInflater, container: ViewGroup?, savedInstanceState: Bundle?): View? {
        return inflater.inflate(R.layout.facet_fragment, container, false)
    }

    override fun onViewCreated(view: View, savedInstanceState: Bundle?) {
        super.onViewCreated(view, savedInstanceState)
        val viewModel = ViewModelProviders.of(requireActivity())[MyViewModel::class.java]

        facetList.let {
            it.adapter = viewModel.adapterFacet
            it.layoutManager = LinearLayoutManager(requireContext())
            it.autoScrollToStart(viewModel.adapterFacet)
        }
    }
}
Improving the user experience: Highlighting
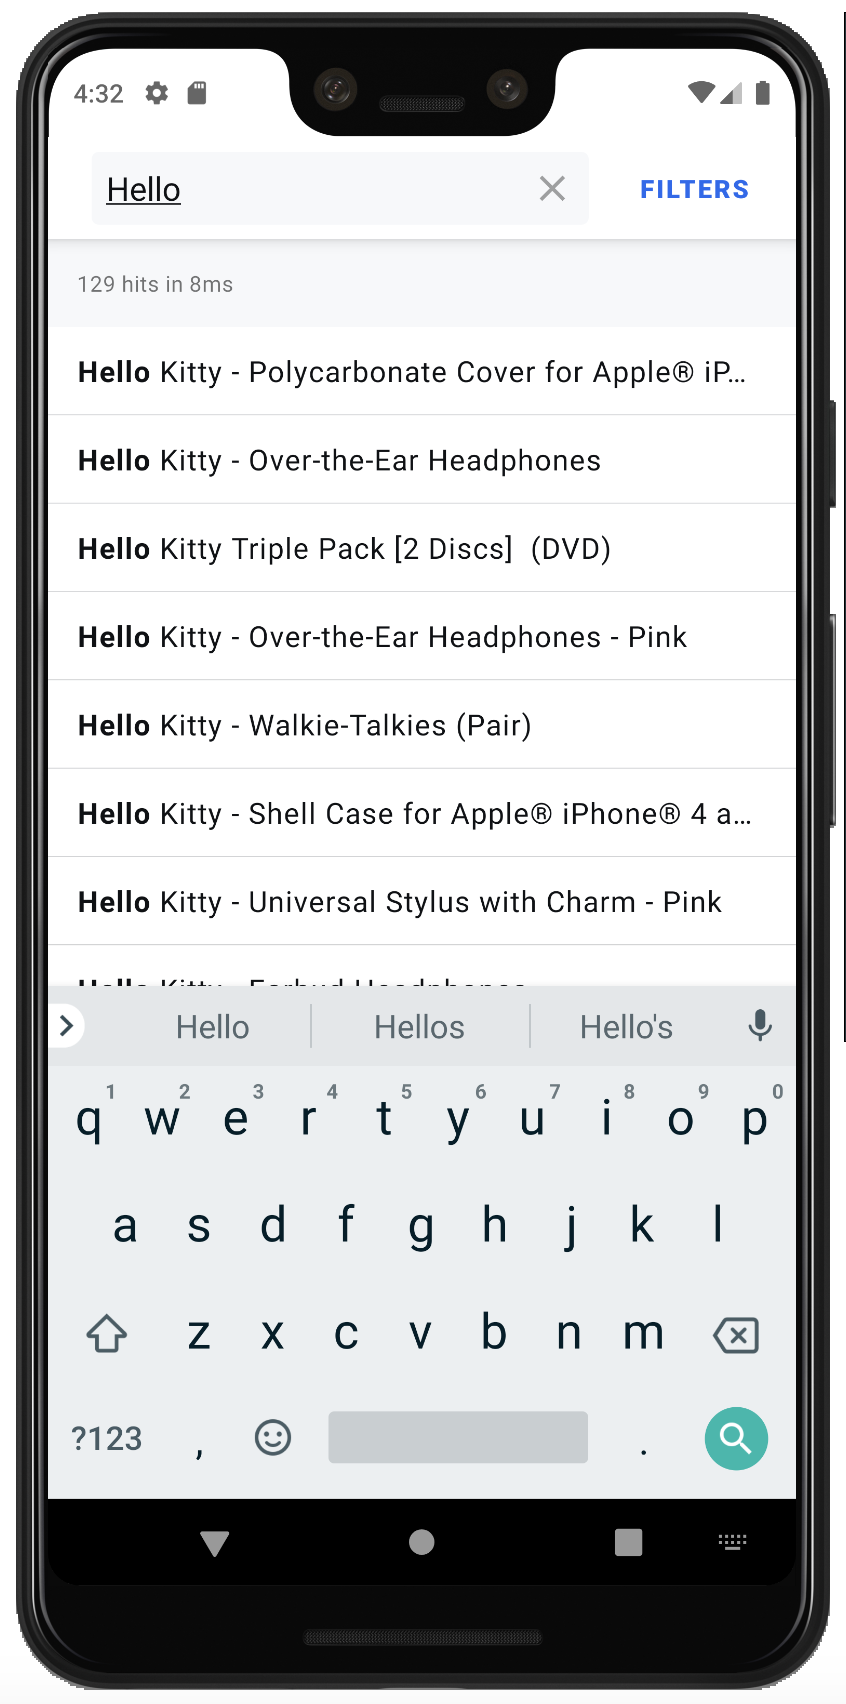
Highlighting enhances the user experience by putting emphasis on the part(s) of the result that match the query. It is a visual indication of why a result is relevant to the query.
We add highlighting by implementing the Highlightable interface on our Product.
- First, define a
highlightedNamefield to retrieve the highlighted value for thenameattribute.
1
2
3
4
5
6
7
8
data class Product(
    val name: String,
    override val _highlightResult: JsonObject?
) : Highlightable {

    public val highlightedName: HighlightedString?
        get() = getHighlight(Attribute("name"))
}
- Modify your
SearcherSingleIndexDataSourceconstructor to inject the highlighted values into each of yourProductobjects.
1
2
3
4
5
6
7
8
9
10
11
12
13
class MyViewModel : ViewModel() {

    // ...

    val dataSourceFactory = SearcherSingleIndexDataSource.Factory(searcher) { hit ->
        Product(
            hit.json.getPrimitive("name").content,
            hit.json.getObjectOrNull("_highlightResult")
        )
    }

    // ...
}
Finally, we can display the highlighted names:
- Use the
.toSpannedString()extension function to convert anHighlightedStringinto aSpannedStringthat can be assigned to aTextView.
1
2
3
4
5
6
class ProductViewHolder(val view: View) : RecyclerView.ViewHolder(view) {

    fun bind(product: Product) {
        view.productName.text = product.highlightedName?.toSpannedString() ?: product.name
    }
}
Putting it all together
You now have a fully working search experience: your users can search for products, refine their results, and understand how many records are returned and why they are relevant to the query!

You can find the full source code here.
Going further
This is only an introduction to what you can do with InstantSearch Android: check out our widget showcase to see more components!
