Back-End Issues
On this page
Introduction
The most important thing to do when encountering an issue, is to make sure the extension in use is up to date. It’s possible that the issue was already fixed in a new release of our extension.
Another perk of keeping the extension up to date is that we will constantly improve performance and security of the extension.
Making sure that the extension is up to date
To make sure the latest released version is installed, please check our Github repository.
Compare this version to the version stated in the etc/module.xml file in the Magento installation.

Because we keep track of which API Clients use your indices, it’s also possible to check for updates through our Dashboard. You can find the API Clients using your indices by navigating to Monitoring > Operations > API Client.

If a new version is available, it will be displayed next to the version in use.

To update the extension, please read our page on upgrading.
Understand how your Magento configuration determines the number of indices to create
When setting up our extension for the first time, the account credentials need to be filled in. Once these are saved, and the credentials are correct, our extension will instantly create the indices required in your account. The indices created can be checked by going to the Dashboard.
Sortings
By default, our extension will create 3 replicas for each product index. These replicas are directly related to the sorting configuration in the InstantSearch section.
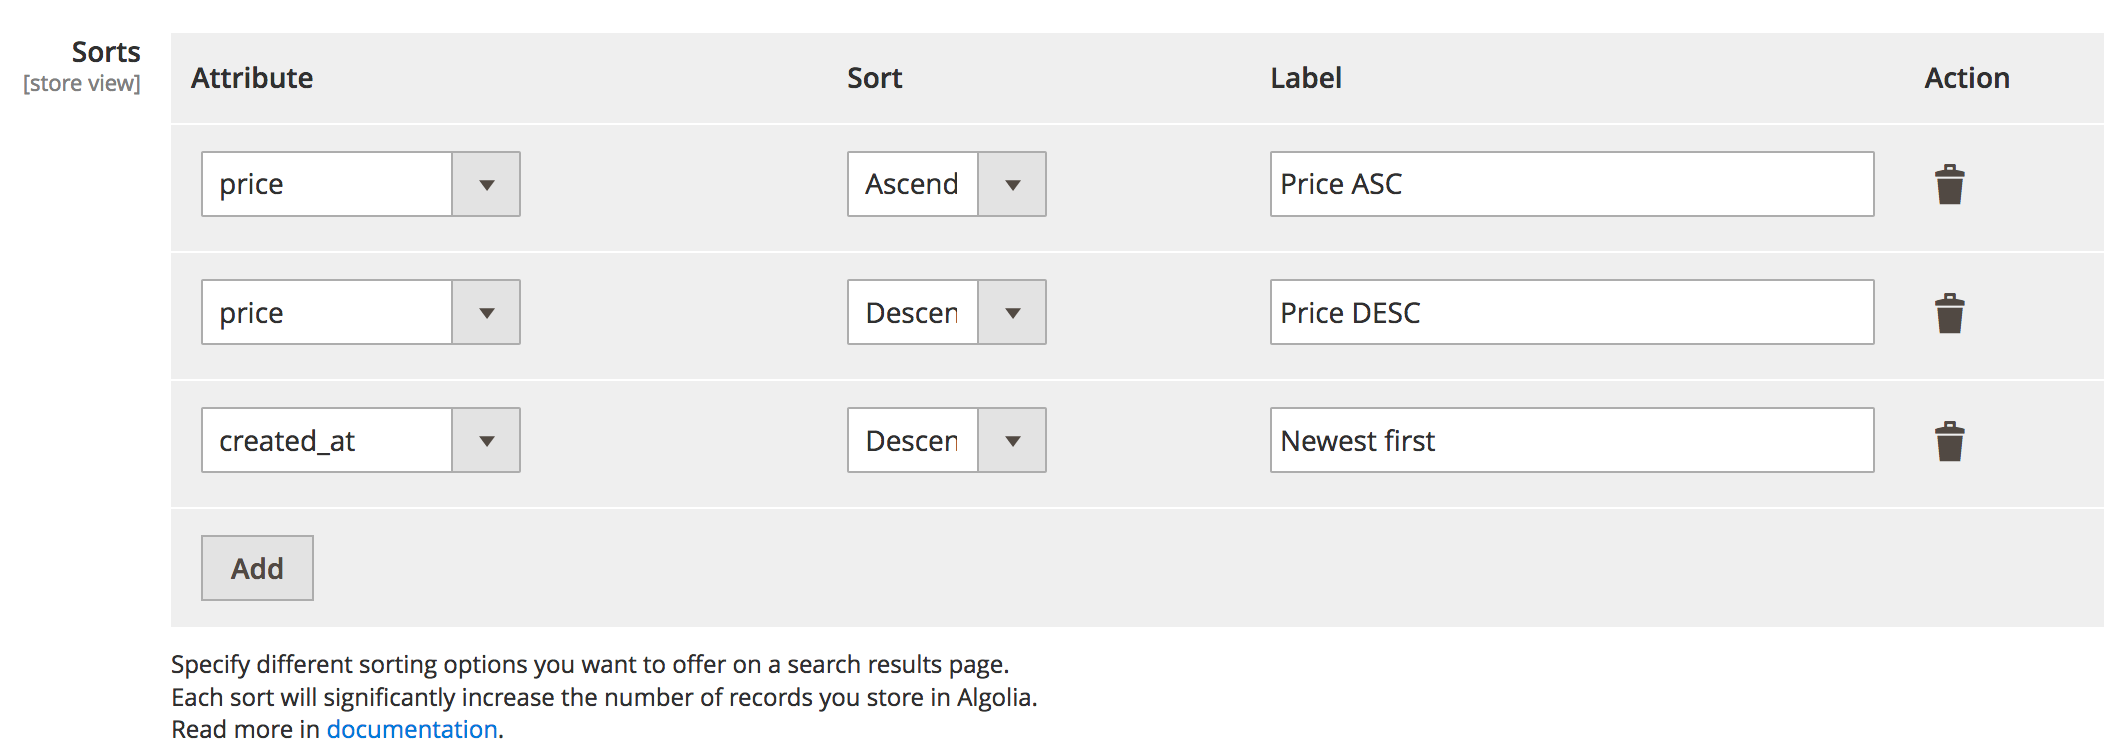
Modifying these sortings impacts the number of created replicas directly. To learn more about it, have a look at the related FAQ entry.
Indices
It’s extremely useful to keep an eye on our Dashboard. It provides insight into the usage of indices by the Magento extension, and let’s you keep an eye on the amount of indices created.
Indices created through the Magento extension depend on the configuration of the extension inside Magento to configure the indices for product, categories, and additional sections. The index name is influenced by the defined index name prefix in the Magento configuration.

If our extension is used in production, it probably has to be used on an acceptance/staging, or development, environment as well. Defining meaningful prefixes to instantly identify which index belongs to which environment is a very good practice. This will give indices with a naming like prod_magento, staging_magento, dev_magento, etc.
The first step to successful indexing, would be to master the configuration in Magento. This way, it’s easier to anticipate the number of indices that will be created. The indices can be checked in the indices list. If the number of indices is incorrect, it’s probably because something is wrong with the configuration in Magento.
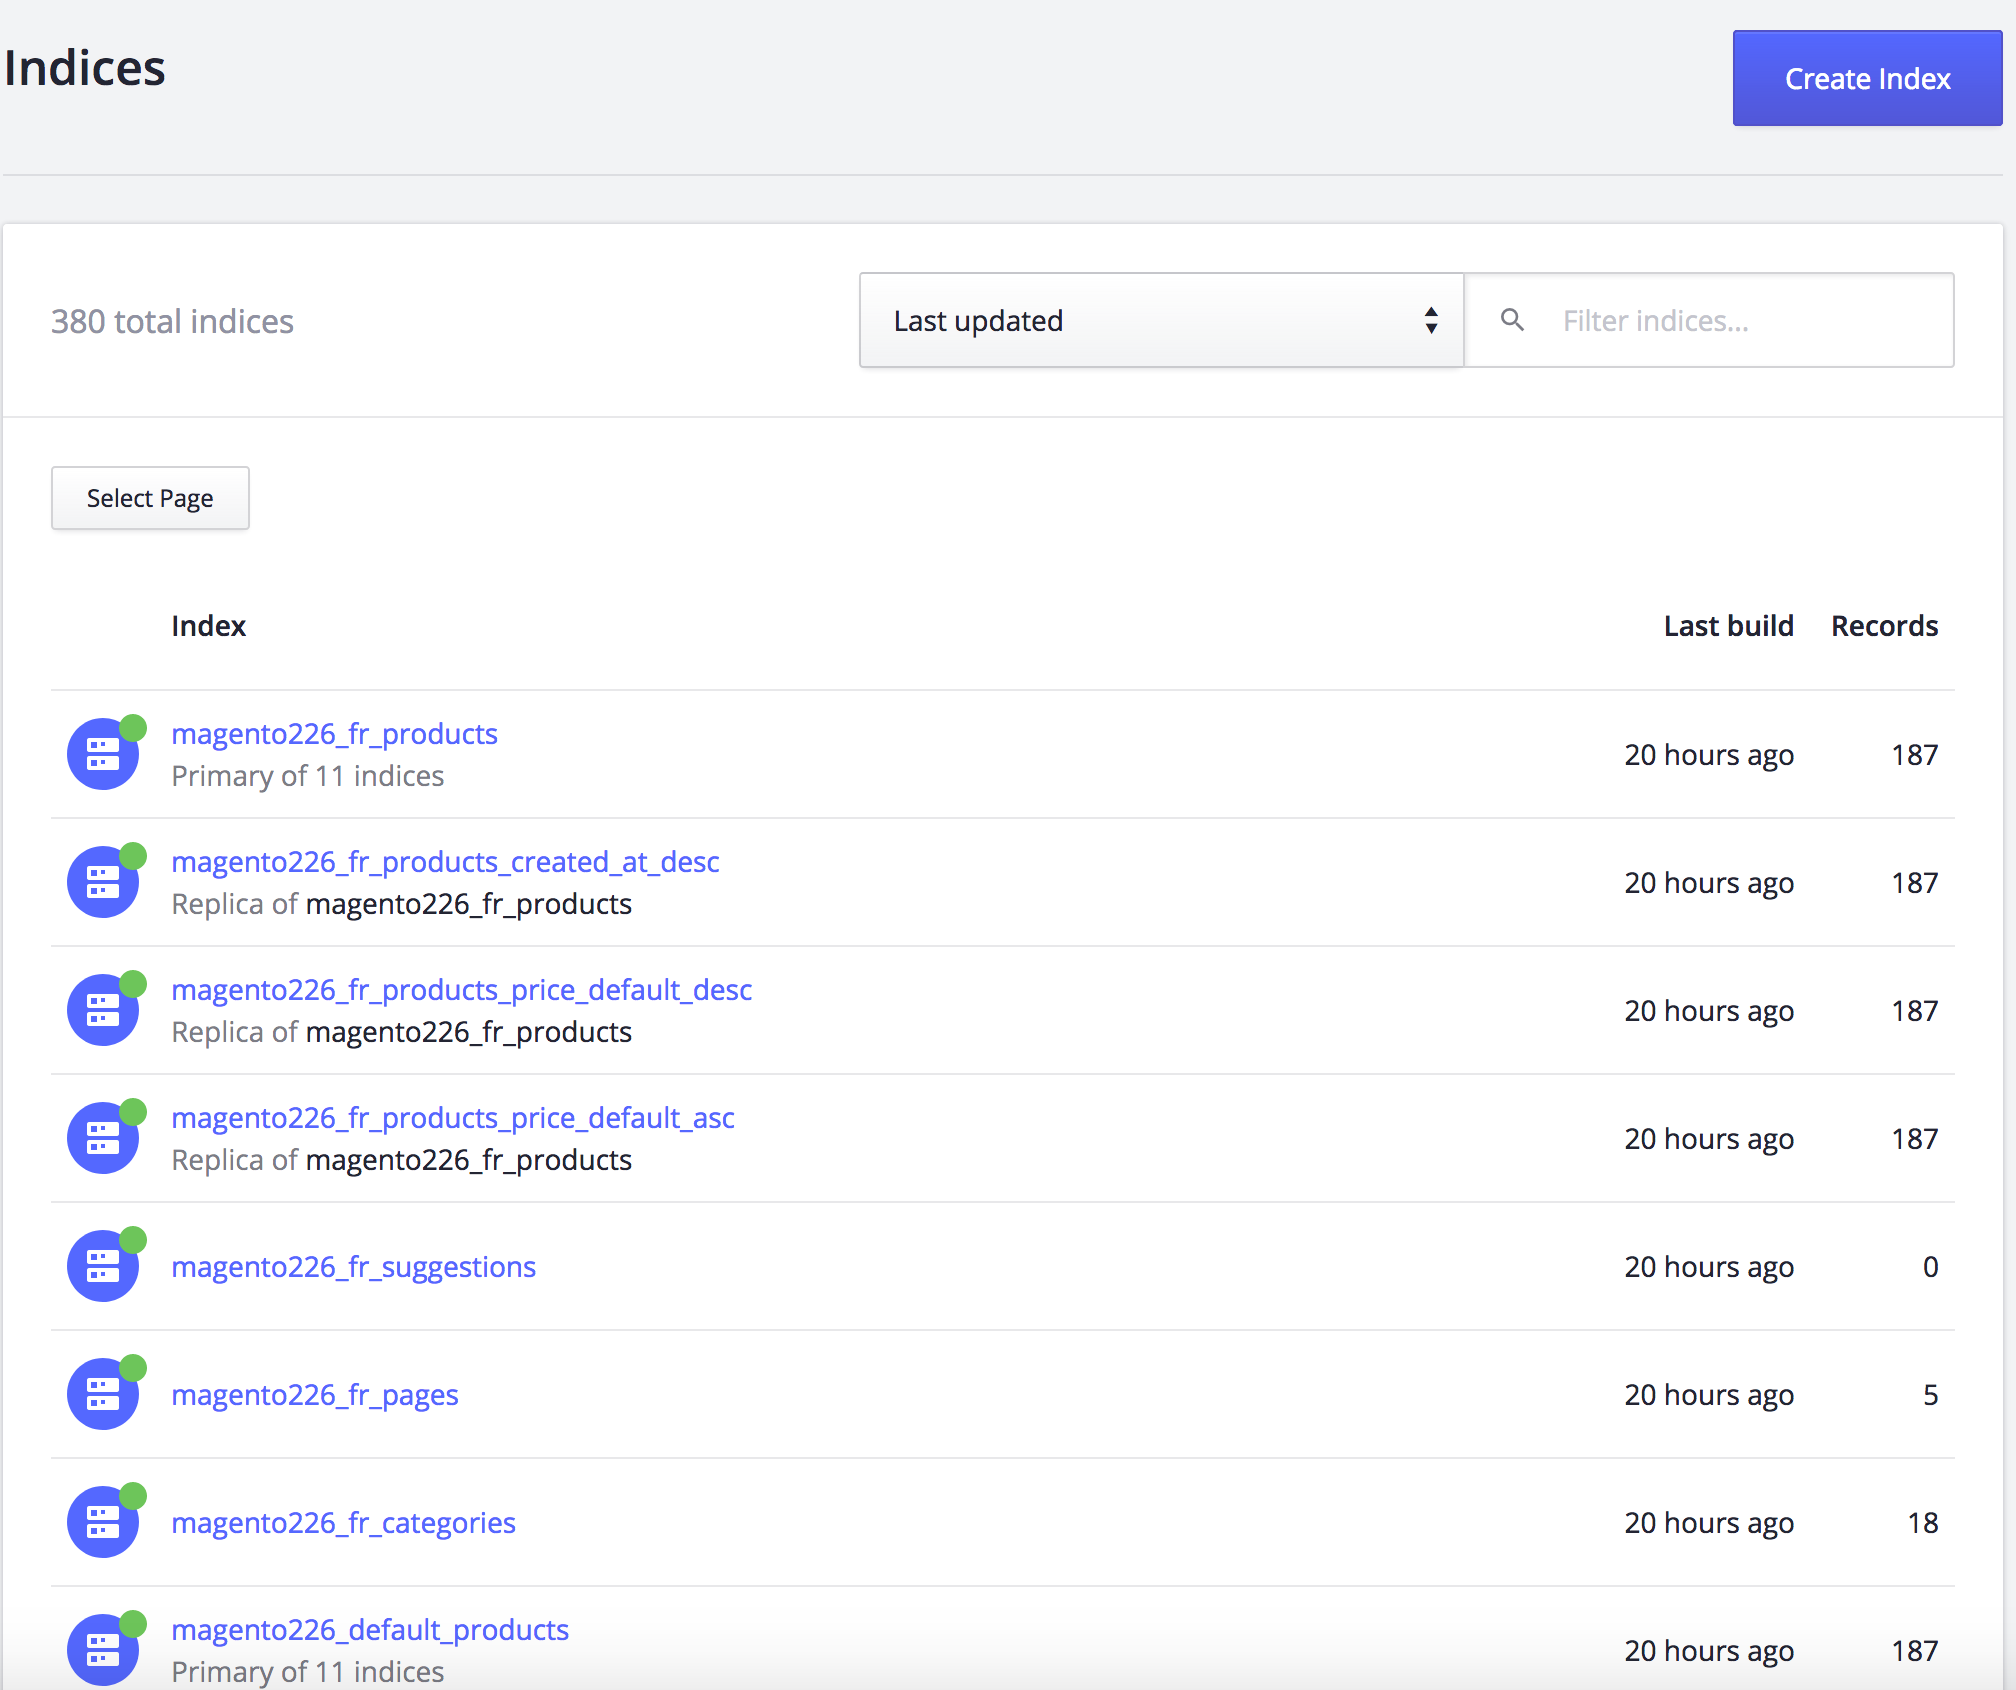
Incorrect configuration
Here are some examples of Magento configurations that can lead to an unexpected amount of indices created.
Different configuration on store view or website level
Magento allows users to define both default configuration, and a configuration related to a certain store view or website. Some of our extensions’ settings are configurable this way too.
For example, it’s possible to have different sortings on two different websites in the same Magento installation. This will create a different number of indices created for these two websites.
This kind of manual configuration is easy to forget, especially with more than one administrator. Since Magento only displays the default configuration when landing on the settings page, it is easy to overlook.
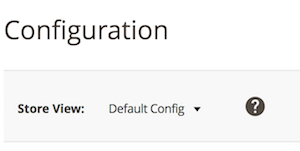
If an unexpected number of indices is created, please make sure no unwanted configuration was set by switching from the default settings to store view or website specific configuration.
All Stores configuration
Please keep in mind that our extension adheres to the websites, stores, and store views listed in Magento. The list of these can be found by navigating to Stores > Settings > All Stores.
If the webshop using our extension is multilingual, keep in mind every language will need its’ own indices, and the number of indices can greatly increase because of this.

Customer group configuration
By default, Magento creates a set of four customer groups: General, Not logged in, Retailer, and Wholesale. Third party extensions can create their own customer groups in the Magento installation, sometimes even hundreds of them.
Our extension gives the possibility to manage customer groups, in the advanced section of the configuration. When enabling this feature, please be careful: every customer group will create new indices. If another third-party extension created hundreds of customer groups, hundreds more indices will be created per store view.

Out of sync data
When it seems like data is not pushed to our servers, there are 3 possible reasons for this.
- An error occurred during the indexing process. Please read how to investigate the logs here
- If the Indexing Queue is enabled, there could be a problem with the processing of the queue. Read more about this here
- The product or category being indexed has a particular status preventing it from being indexed.
The requirements for a product or category in order to be indexed can be found on our indexing page.
Debugging missing products/categories
Whenever your data is not showing up while it meets the requirements listed on the indexing page.
First thing, go into the Magento back-office and find the product or category missing.
Then, just save the item without changing anything.
This should trigger the Magento save event, and sends any data that should be updated to our servers.
This can be tried with the Indexing Queue turned of as well.
Now, head to our Dashboard.
Here, you can check if the product or category was updated. Navigate to the index, look up the product/category and check the AlgoliaLastUpdateCET attribute.
This attribute contains the date and time the records was updated (Central European Time).

If the products is still out of sync, check the logs on our Dashboard.
The logs can be found by navigating to Monitoring > Logs, and inspecting the Latest Operations panel.
Reindexing triggers a POST request that should appear at the top of the list.
The url should something like /1/indexes/[INDEX_NAME]/batch.
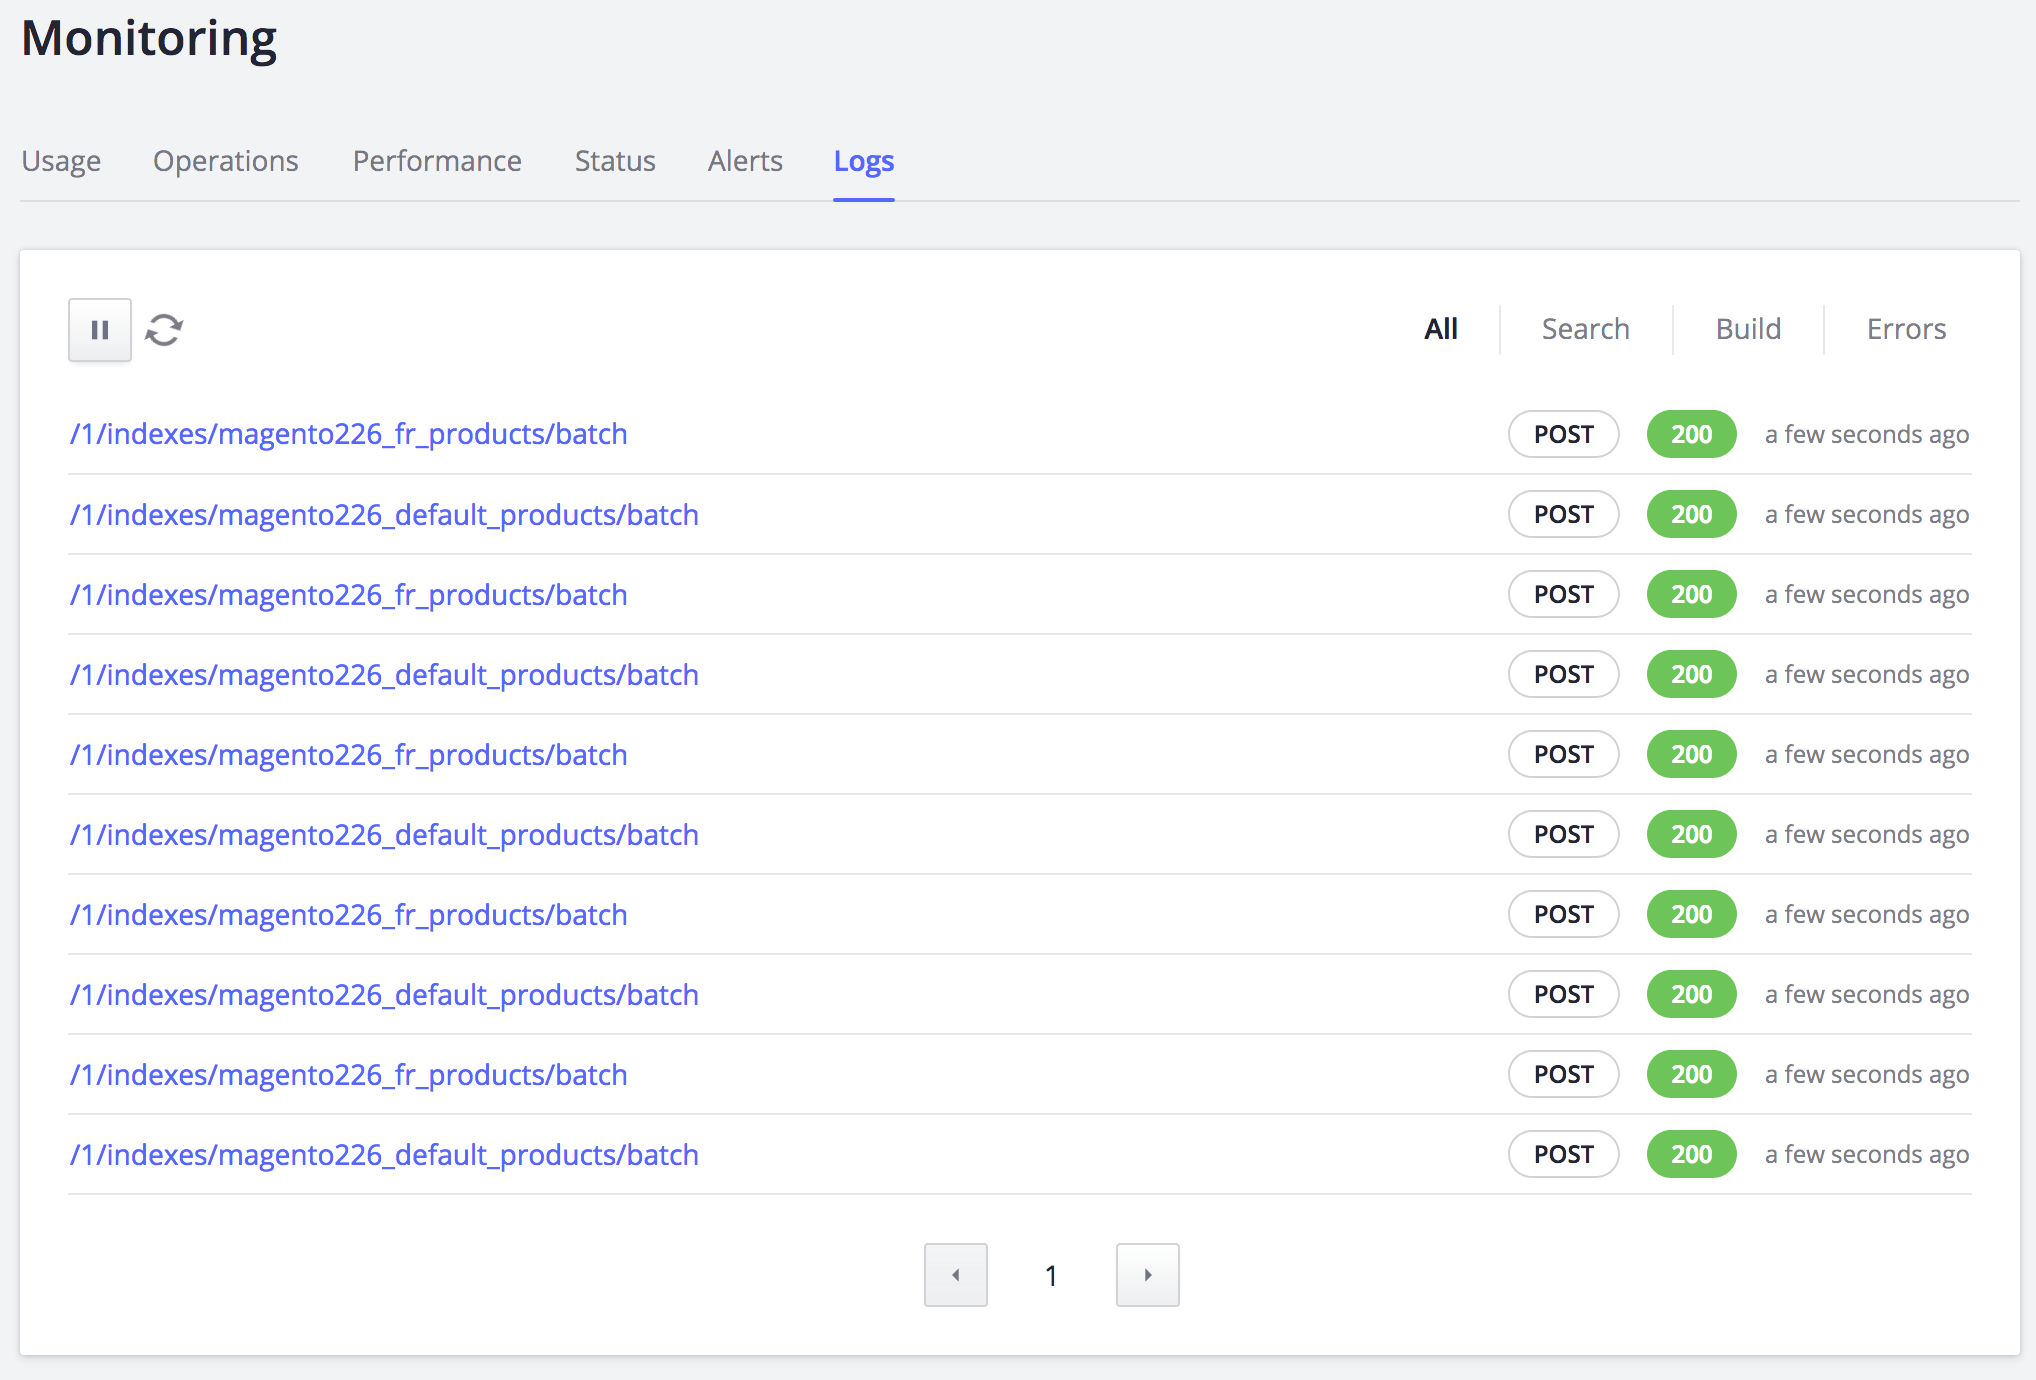
By clicking the link, the request details will show up. The Request Body tab should contain an AddObject action with all the entity’s attributes. If the attributes are there, it means the record was successfully sent to our servers.
If the attributes are not updated, and the AlgoliaLastUpdateCET attribute in the index’s object is not updated as well, the SKU Reindexing Form should be used.
This form will give you feedback on why the product is not updated.
Third-party extensions
Our extension relies on Magento’s plug-in system. By leveraging this system, we apply our logic on the following Magento classes:
Magento\Catalog\Model\ResourceModel\ProductMagento\Catalog\Model\Product\ActionMagento\CatalogInventory\Model\ResourceModel\Stock\ItemMagento\Catalog\Model\ResourceModel\CategoryMagento\Catalog\Model\Category\Action
Any third-party extension that updates resources without triggering Magento’s save events on the classes listed above, will break the real-time updating of the catalog.
To fix this, the reindexing has to be triggered manually.
Updates are not propagated to Algolia
In case the data seen in our Dashboard has unexpected values, have a look at the attributes specific to the store view or website. Our extension respects settings set at the store view and website level, and this may override default settings. To check if this is the case, change the view to show the store view or website setting by using the store switch on the top-left corner.

Investigate the logs
First of all, it’s important to figure out if your indexing process generates errors or not. Sometimes, since the process can be asynchronous, errors can happen without being aware of it.
During the asynchronous indexing process, our extension generates temporary indices, suffixed by _tmp.
For example, if the main product index is magento_products_default, the extension will generate an index named magento_products_default_tmp.
The temporary indices are created to do an atomic reindex to prevent production indices from being corrupted.
Because the temporary index is only swapped after the whole process completed successfully, it’s easy to discover if an error happened in the process.
If an error happened, the temporary index will still exist.
To check this, visit our Dashboard and check any indices that end with our _tmp suffix that haven’t been updated in a while.
If this is the case, the process probably has an error.
All errors are logged by default in Magento. The var/log folder in the Magento installation contains two log files:
system.logexception.log
If you want to see if anything gets logged during the indexing process, run the following command from the terminal (from the root folder of the Magento installation) before re-running the indexing process again:
$
tail -f var/log/system.log var/log/exception.log
The logs will provide the exact error messages for the errors that occurred. This message makes it possible to pinpoint the source of the issue.
We also provide the options of more detailed logging during the indexing process. Read our logging and debugging page to learn more about this.
The queue may be stuck
If the data in your index is not up-to-date, it could be possible that the Indexing Queue is stuck. Follow these steps to make sure the queue is not stuck.
The Indexing Queue relies on one of Magento’s indexers, added by our extension; the algolia_queue_runner.
To learn more about Magento indexers, read the official Magento documentation.
First of all, make sure the Magento indexer is “ready”. This can be done by running the following command in the command line:
$
php bin/magento indexer:status algolia_queue_runner
If the status of the queue is “processing” for a long time, it may need to be reset. The queue can be reset by running this command in the command line:
$
php bin/magento indexer:reset algolia_queue_runner
Monitoring the queue
Since version 1.8 of our extension, a screen is added in the Magento administration. This screen can be found by navigating to Stores > Algolia Search > Indexing Queue. This page contains a grid, displaying the contents of the indexing queue. It provides an easy way to monitor the amount of operations the queue needs to perform.
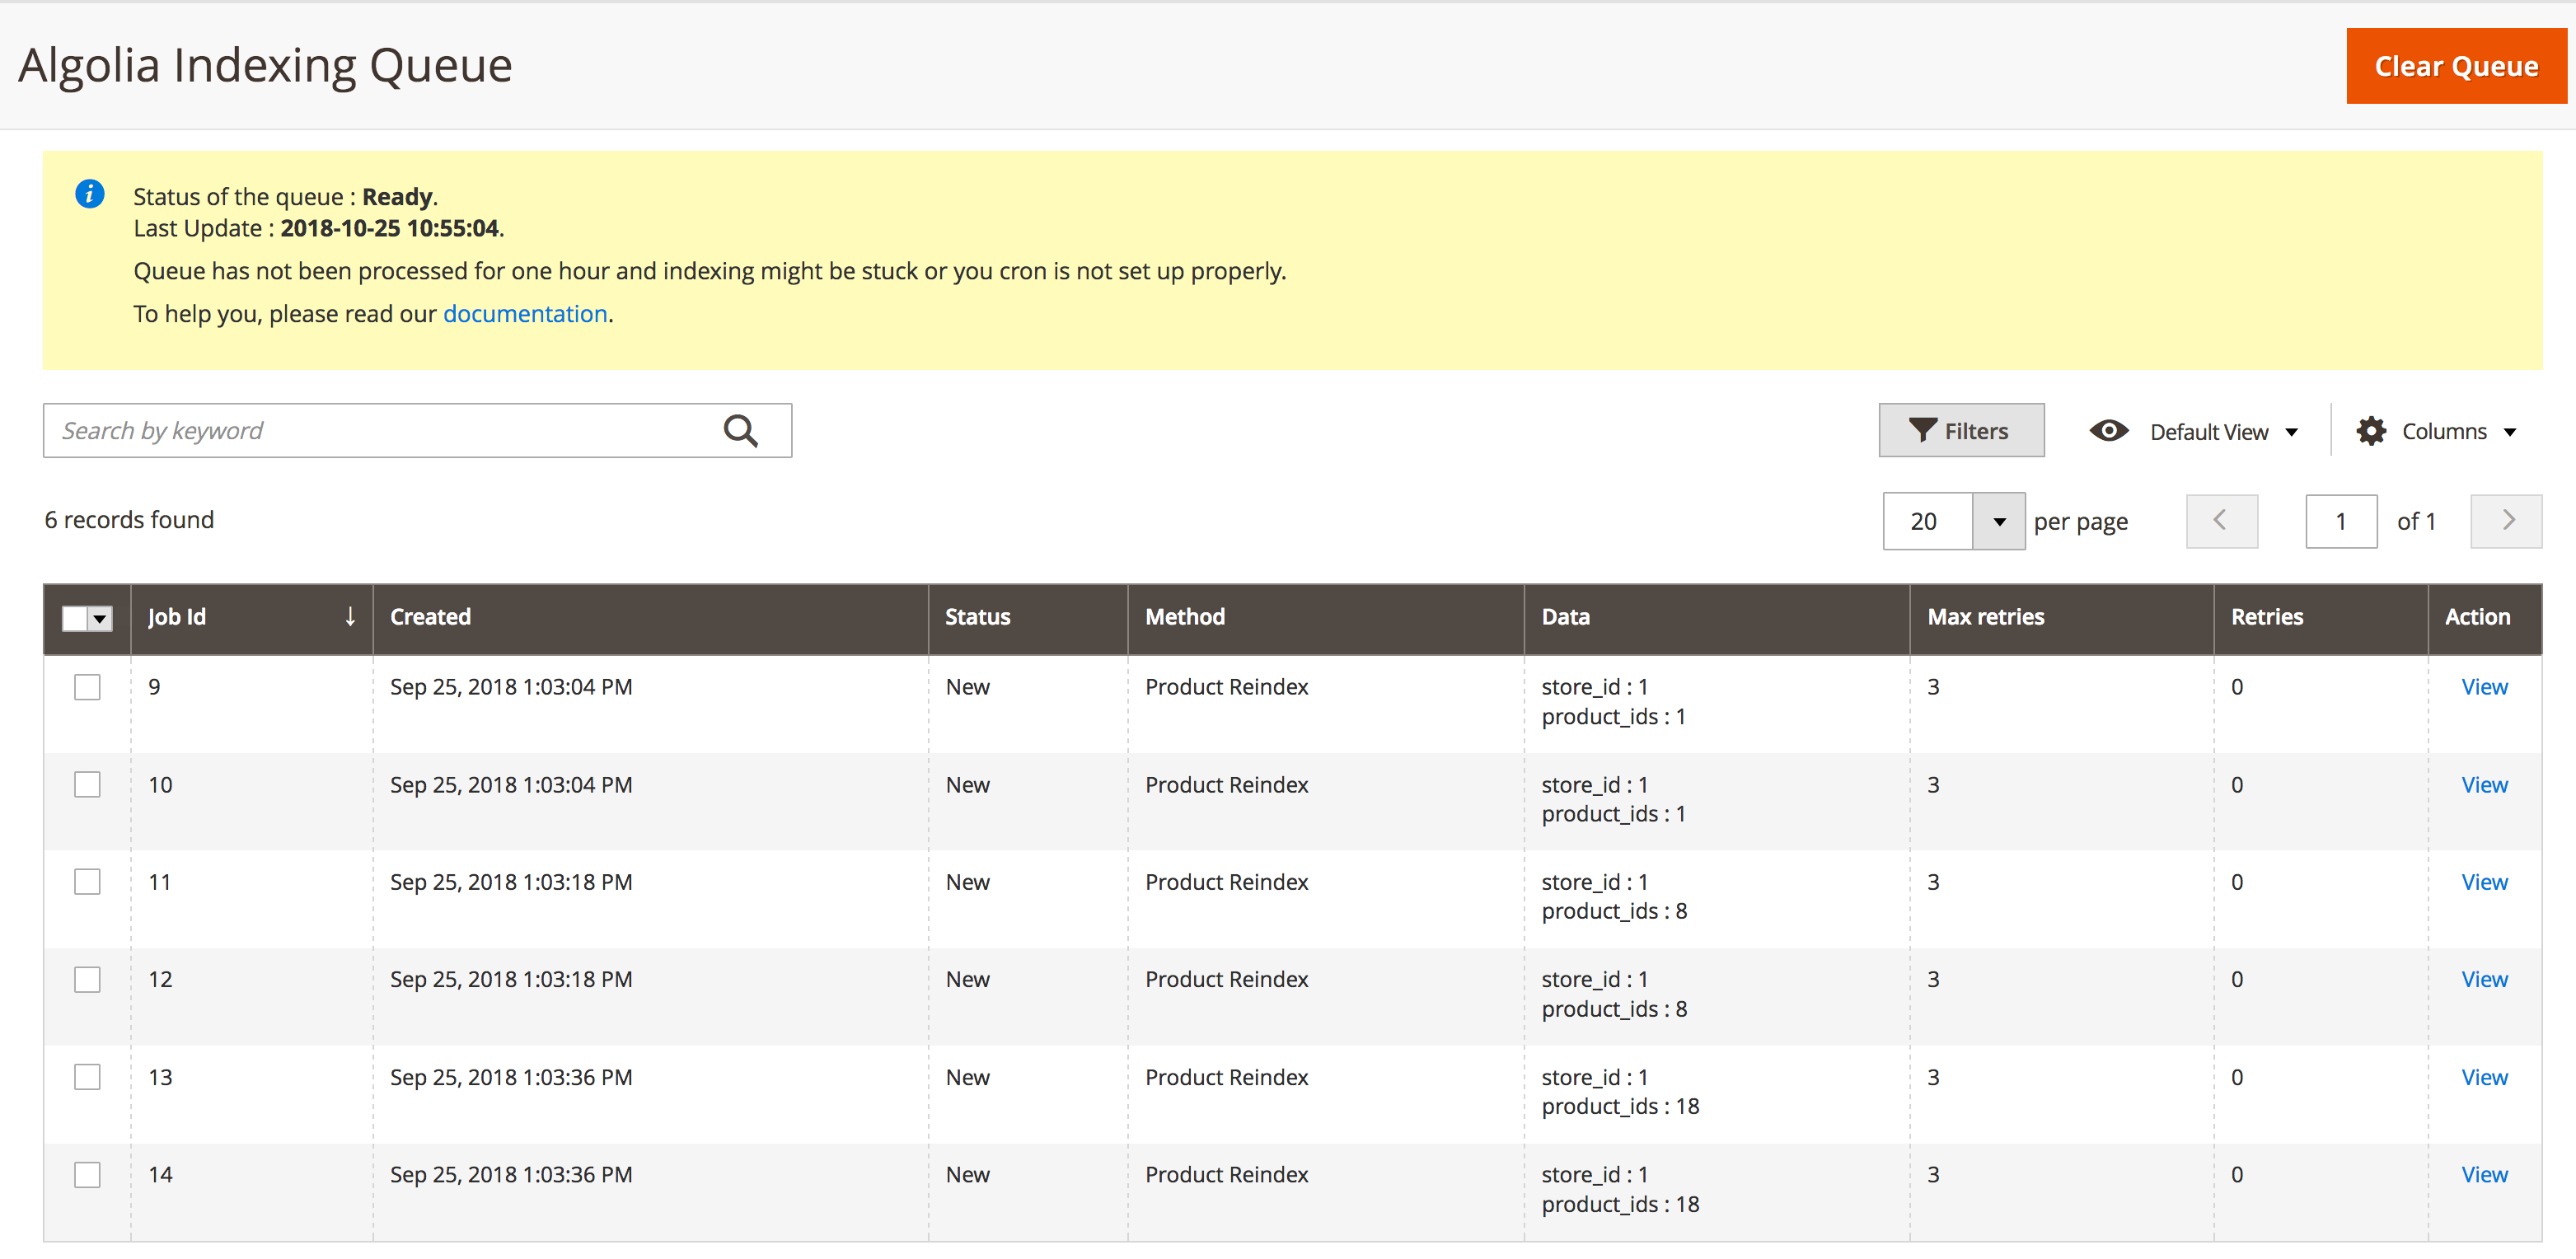
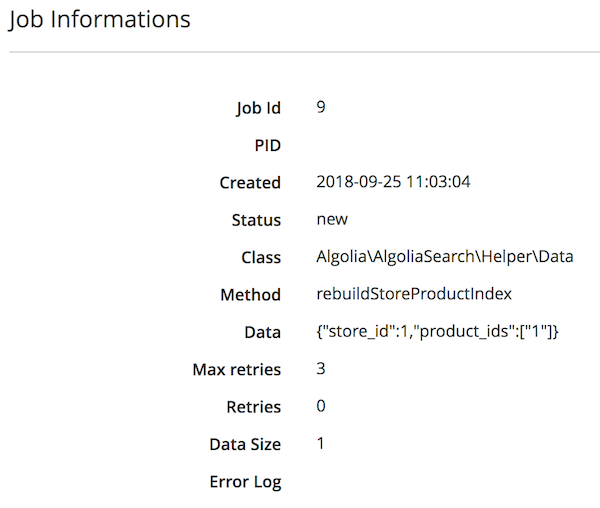
The operations listed can also be viewed in detail by clicking the ‘view’ link. Any error occurring during the job will be logged in the Error Log attribute.
At the top of the page, a recommendations section will be shown, to help you configure and optimize the queue in the best way possible.
If the Indexing Queue is performing normally, the amount of jobs on the page should decrease every 5 minutes (don’t forget to refresh). When the amount of operations doesn’t decrease, please make sure the queue is set up properly.
Finally, since version 1.8 of our extension, any failing operation that reached the maximum amount of retries will be archived in the algoliasearch_queue_archive table. This can be another useful place to check for error logs, since we automatically store the last encountered error along with the job.
